WELCOME to my BLOG

Hi there!

I’m slowly working towards some simplicity within the home, but hey! It’s a lot of hard work!

I love having a go at growing my own veges and always use herbs fresh from my garden. I try to plant from seed whenever I can and have learnt to save and share my own seed for the following year. I make Award Winning preserves and pickles; and my husband brews Award Winning boutique beers as well. I love to stockpile and try to limit quick trips to the shops. I dabble in bread making and enjoy making my own stocks too.

I enjoy feeding my family good hearty meals, nothing like those tiny restaurant stacks you have to look for on the plate. My husband maintains our vehicles and machinery and we both enjoy fabricating on a small scale mostly relying on metal & timber recyclers for any materials needed.


While I don’t always have time to reply to comments, I love reading them. I hope you enjoy your stay and I hope you learn something new because I love sharing what I learn, and I'm always looking for another new skill myself.

Cheers!

Wednesday, June 29, 2011

Pasta n Sauce - from scratch

My boys love Pasta with a creamy sauce...here is one I made from scratch the other night using up some eggs that were in the fridge.......

First I boiled some pasta spirals...I just buy the cheap brand...while the pasta was boiling, I also needed to boil the eggs...as I would later add the boiled egg to the pasta dish....Now me being me, couldn't see any point in getting another pot out...so I just put the eggs in the same saucepan as the pasta....don't worry; the eggs weren't floating...they're just sitting on the pasta...lol


Here is another simple mix I do...which saves a heap of time in the kitchen....In the whizzer, add 1 jar of chopped garlic, 1 or 2 bunches of spring onions...a handful of basil..this time I also added some parsley and cilatro...also some sorrel and spinach..all picked out of the garden....Remember, anything you add is a time saver....then blitz it all down with Olive Oil....

Place in clean jars and store in the fridge...Olive Oil sets when it is refridgerated, so this will thicken once chilled....but even a teaspoon in a cup of boiling water with a pinch of salt....lovely on a cold winter day....like having your very own cup-a-soups.....

this lot will last me about 2 weeks...I use it in many dishes
even as a spread on salad sandwiches instead of margarine.
Now back to that pasta dish....strain the pasta...keeping aside a bit of the liquor....
Peel the eggs and roughly chop them...although I put them through an egg slicer twice..rotate the sliced egg and repeat....for a diced effect....
Add a huge spoonful of the herb n garlic mix I made above....

Add some grated cheese that I store in the freezer...(so it doesn't go mouldy)

Now pour a cup of the cooking liquor that was kept back...into a jug and add a large spoonful of white sauce mix...and stir until combined.
Add this to your pasta, egg and herb mix....and stir well...cook for another 10 minutes to cook through...If it thickens too much...add some more of the cooking liqour.....and stir well.
Sorry no measurements..as it will depend on how many you are feeding...I used this to serve as a side dish and had enough for two nights.


do you make a similar recipe? I'd love to hear about it....

Tuesday, June 28, 2011

Cultured Butter & Extending your Buttermilk

Wow!! over 20,000 hits since February....Truly amazing...the numbers blow my mind...It's nice to know that people are interested in what I write......

My husband says....."You're giving away all your secrets"....and I say back to him..."no...I am sharing what works for me".....Welcome to Ros, Hazel, Kat and Artylady....I hope you find my blog interesting...stick around..and don't forget to leave some comments or questions....I'll reply as soon as I can.......

Back to blogging:

I've heard of cultured butter before...but never had the opportunity to taste it....So...me being me, I thought I would just make some and try it...Why not!

To make cultured butter, you first need to pour your cream in a ceramic bowl...and cover with a cloth.
Leave the cream on the kitchen bench for 24 hours...not too much longer though as it will be too sour and give an undesirable flavour in your final butter.....

So after 24 hours, chill the cream again in the fridge for a few hours....then beat with a whizzer or shake vigorously in a sealed glass jar, until the solids separate from the milk...leaving your cultured butter and buttermilk....Strain and wash your butter...add salt to taste.....and store your Buttermilk in the fridge for later baking.

Drain well to preserve the Buttermilk for baking.


L: Cultured Butter, Right: Butter
I now prefer the taste of cultured butter...my taste-buds are so spoilt.

***************************************************************
Extending your Buttermilk:


After making Butter at home...you will be left with a lovely natural Buttermilk...which is perfect for baking...I recently made Buttermilk Scones...and have been drooling thinking about them ever since. There are plenty of  recipes on the net for using Buttermilk....I am also interested in using it to coat chicken drumsticks before baking...this sounds interesting.

The standard rule to extend your natural Buttermilk...is 1 to 3.....
Measure your Buttermilk...and let's say you have 1 whole cup....add three times that amount in Milk.....to the Buttermilk....so you would add 3 cups of milk to your Buttermilk....

Let stand for 24 hours at room temperature, covered with a cloth....If you started with one cup of Buttermilk....after 24 hours you would have 4 cups of Buttermilk....
a much better amount to be experimenting with for baking.

This Buttermilk will also store in the fridge for 2 weeks...Actually it won't ...because I will have used it up before then.


I also had a go at Rhonda's Orange Cake over at Down to Earth.....truly one of the easiest cakes I have ever made....In the back of the photo, you can see what is left of one cake....I made a double batch of batter.....one cake for now..and one for the freezer.....We went through one whole cake just tasting it.....
I guess I don't have one for the freezer now......

All you do is:
Throw a whole Navel Orange in the whizzer and blitz it....then add the eggs, butter, sugar and flour....pour into a lined baking loaf tin...and bake for about 40 minutes in a medium oven.
For the original recipe go over to Down to Earth....Thank-you Rhonda for an amazing recipe...I'll make a lemon one next time, but Buttermilk scones is on tomorrow's baking list.

Monday, June 27, 2011

Bokashi Powder - Part 3 - final

I recently completed a FREE course run by my local council on how to make your own Bokashi Powder...
I wrote about it here, along with the recipe and details on how to make it...

So first of all, you need to prepare your lactic acid..You will see Part 1 here 

Then to complete the last step in preparing the lactic acid ready for the Bokashi Powder I wrote Part 2 here

I last wrote the following: ...................


now I am waiting for it to seperate, once that happens, I will be on to Part 3.

2. Leave for a few days until the milk protein separates from the water which can be removed from the top.

3. This leaves a creamy yellow water which you can use.

4. To keep, add equal parts of molasses or brown sugar and store in the fridge.

So here goes for the final step....gathering all the ingredients and making the Bokashi Powder

The milk protein separated....but I didn't keep the whey for scones this time...I'm keeping it for the Bokashi Powder.....


Measure the amount of whey liquid you have...and add the same amount of brown sugar or molasses ...and mix well...This is ready now to use in the Bokashi Powder recipe...and also ready to store in the fridge until you need to make more.....
Equal parts of brown sugar and the whey liquid.

Making up the final liquid to add to the dry mix...
Add 2 Litres of rain water or filtered water...(not tap water, as there is too much chlorine)
also 20mls of the Lactic Acid you have made....
and 20mls of the Brown Sugar....It's a bit unclear if this is needed in the recipe, seeing it has already been added to the larger bottle....but I figure it won't hurt.....
Mix it all together..you now have your wet mix ready to move on to the final stage of mixing....


Below:  See the colour of the water in the recycled milk carton at the back....It's changed colour because it is the now ready to add to the dry ingredients.....

Measure your Linseed or Flaxseed....the 1 kg bag I am holding shows what was left after measuring out 1 Litre of the seed.....this bag cost me $5.20 and I needed about 3 and a half bags.....


 Above: Left to Right: A mixing tub..5L of flaxseed (linseed), on the bucket is the wet mixture, then below is the chicken manure....and Wheat Bran....

25kg of Chicken Manure cost me $6.00   (I used about a quarter of this...$1.50)
25kg bag of Wheat Bran cost me $14.00 (I used maybe an eighth of this....$1.75)

Mix in a large tub...the Wheat Bran...the wet mix, the chicken manure, and the linseed.....note how I poured the linseed into the tub, then lined the tub with a plastic bag before measuring out the chicken manure....(manure and food grade containers don't mix in my house)........

 Get helpers in to help mix....don't forget to get into the corners.....due to the manure in the mix...wear gloves if your going to use your hands......Thanks for helping DS16...I love ya!


After mixing it really well.....then mixing it some more.....bag it up.....removing as much air as possible....Remember this works on the anaerobic principles.
The final price I have worked out to be $24.25.....Now the middle bag in the top row; is a reused 5kg Bokashi bag from Bunnings which cost me $17.00.....I reckon I have about $95 dollars worth of Bokashi Powder there....

So for all the people who are asking if it is worth it.....You betcha it's worth it....What a huge savings.
Plus; I don't feel like I need to scrimp when adding the powder to my food scraps now....... 

Once bagged up....you need to let it ferment ....so wrap the bags in a black plastic  bag....and place in a cool dark place..In about 2 weeks or so...check on the mix by just moving the tub...If it has started fermenting...you will smell it...It is not an offensive smell....rather sweet really....


The total price:

Rice: not added as after soaking and rinsing the rice....I cooked it for tea that night.....I only needed the rinsing water for the Bokashi recipe.
Water: nil
Wheat Bran: .50 cents
Milk: 3 cups or 750mls $2.00
Flaxseed: $18.50

Chicken Manure $1.50
Wheat Bran $1.75


Total Price:   $24.25.....a savings of over $70.00

Citrus Cleaner goes crazy...


I recently posted my Citrus Cleaner.....and kicked off the beginning of a huge group of lovely ladies starting their own cleaners over at the Down to Earth Forum.....I can imagine lots of kitchen benches..each embracing their very own jar of citrus peels, soaking in white vinegar....Some may even be sitting on window ledges basking in the sunlight, soaking up the sunshine.

Members over at Aussie's Living Simply...have even started soaking their citrus peels....

And for what you may be asking?....just the best darn cleaner you could get your hands on......If your like me.....you already use white vinegar as a fabric softener....so it's already in the house and on your shopping list.......and your constant supply of oranges, lemons and limes, or maybe grapefruit and mandarins.....all peeled before using..pinching the peels for your citrus cleaner bottle....the more you can fit in the jar ..the better....just add them as you use them.

Once you can't fit any more peels in the jar....strain it and pass the peels on to the compost bin..to be saved and made into your own free soil.....Save the lovely citrus vinegar for your cleaner....
Now don't bother rinsing out the jar....just start another batch....3/4 fill the jar with cheap white vinegar and start adding your citrus peels as you use them...

Are you juicing lemons for the freezer for your stockpile?....Have you been gifted a bag of oranges....or maybe some limes?....don't forget to peel the fruit with a vegetable peeler before juicing them......and your on your way to 'the best darn cleaner you could get your hands on'.

Have you started your own cleaner?....If so; I would love to hear from you......Please leave a comment telling me all about it.....and let me know what state and country your cleaner is in.....

If you want your jar of citrus cleaner added to this post.....just email me a photo of it....npe09777 (at) bigpond (dot) net (dot) au ..and I will add it here...along with the photo, your name, state and country....

Every picture of your citrus cleaner sent in will be added to this post.....
I'll start with mine.....
Citrus Cleaner...to use; I now do 50% citrus with 50% vinegar.

Becci - South Australia

Anja - Melbourne, Victoria, Australia
Tania - South Australia
Glenda - South East Queensland
Gail - Hervey Bay - Queensland
Kelly - Adelaide - South Australia
Robinsons Family - Melbourne, Victoria, Australia

Christine - Victoria, Australia
Darlene - NSW, Australia
Laura - New Zealand
Deb - Tasmania
Sharon - Victoria, Australia
Mary-Anne - Townsville

Friday, June 24, 2011

On my mind...

This is a Friday photo feature that anyone with a blog can join. It opens the  door to us sharing our lives through these photos and gives us all a new way to discover each other, and maybe form new friendships. Your photo should show something at home that you're thinking about TODAY. If you're in another country you should join in when you read this, even if it's still Thursday.

To take part, all you have to do is post a photo on your own blog, write a short caption explaining it, and link it back to here. Please write a new post, don't link to an older one. When your photo is published, come back and add a comment below, with a link to your blog photo so we can all find you. Please visit all the blogs that appeal to you and leave a comment. Slow down, take the time to cruise around and enjoy your cyber visits.

On my mind today, is the lovely doily's I saved from an op-shop yesterday....I plan to make these into jug covers by attaching beads to the edges...I can do a crochet chain...but I'm still not sure exactly how to attach the beads....I'll probably have a go over the weekend...


My favourite would have to be either the table runner on the side....or the one in front with the pink violets around the edges....this one doesn't need anything doing to it....I'ts lovely just as it is.

Why don't you join in...What's on your mind?

Thursday, June 23, 2011

making Baguettes or Bread sticks

I've been wanting to make Bread Sticks for ages now...as I only ever buy them if I see them marked down......I was excited when I accidentally found a link on how to keep your baguettes in shape while rising....If you scroll down a bit on the link, you will even see that someone has used a painters drop sheet to shape the bread.

I WAS looking for bread proving bowls made out of willow or cane....You know the ones that leave a lovely spiral in the crust of the bread? Yeah, they are sooo expensive, so I guess I will search for the materials and try to make them myself. 

Ok, back to the Baguettes or Bread Sticks as I know them.....The cloth you are need is called a Bakers Couche or a Couche Cloth....and they aren't cheap either....but after doing some research...all you really need is some Heavy Canvas.......the width of the baking tray you will use all the time. But don't cut the length, until you know how many rolls you can support on the chosen tray....I can tell you the measurements of my cloths though...

I looked up canvas in the phone book...and it was easy as there was only one in the book in our area....On the way home from taking mum to do some much needed clothes shopping..(DS19 had a rostered day off, so he pushed mum in the wheelchair today...It's far to far for her to walk in the shopping centres)........

Oh yeah...On the way home I went via Illawarra Canvas in Dapto....and after trying to explain on the phone what I wanted to do with a piece of canvas....the lovely gentleman there gifted me a piece of canvas................

I'm very fortunate, as I had enough canvas to make cloths for two trays both lengthways AND widthways...You'll see what I mean in a minute..(when I stop blabbing on)....

Onto the making......the fun part.
After cutting out the required length of canvas....make sure you flour it well...get in there and run it in. If you don't you run the risk of your dough sticking....a very high risk too............
To get the estimated length of the canvas...
I used my rolling pin as a guide to how big each baguette may be.
Laying the rolling pin down as I gathered up the canvas,
repeating until I ran out of room on the tray.
 To make the baguettes....you don't need to settle for store choice of either Sourdough or Plain White......BECAUSE you are making them yourself...you can use any recipe you choose to.

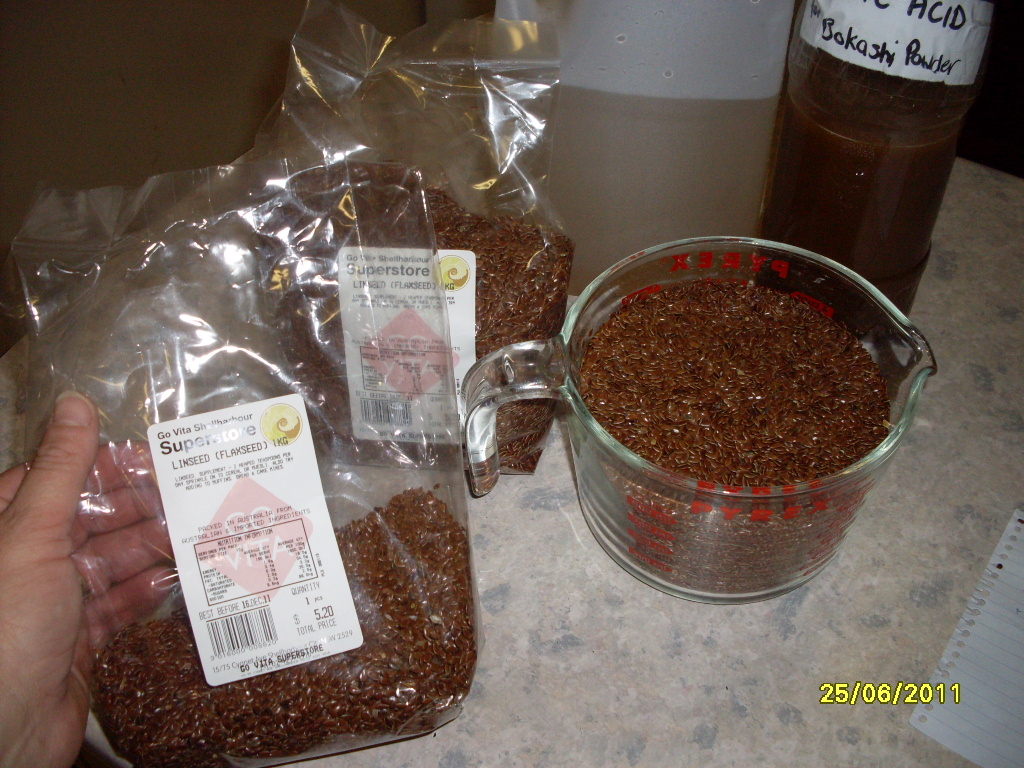
I made some really yummy Linseed, Soy & Almond bread rolls a while back and adapted that recipe by adding some roughly crushed sunflower seeds and also Pumpkin (Pepita) seeds..which I gave a quick bash with the mortar & pestle........

I wish I had found this website before rolling the Baguettes....I found the dough a bit hard to manage while trying to make a long roll.....but technique has never been my strong suit...so I just had a go....and the rustic look is what I was going for anyway...Honest!!

Measure each piece of dough to the same weight
This ensures you get even sized rolls at the end.


Below I am forming longer baguettes by using the length of the tray.
If you scroll down further, you will see where I also used the width of the tray for forming shorter baguettes or rolls in this case.
I was just able to fit 4 baguettes on the baking tray....to rise.
 AFter rising....look how puffy they are....by this time...I couldn't wait to see how they would turn out...
All in all, not a bad experiment so far.

see the magic..how plump they are....
and rustic! Oh...Artisan....that's the one.

Using a piece of grease proof paper...
slide the paper just beneath the dough

Gently roll the formed baguette onto the paper...
then move over to your baking tray.

Position the Paper sheet on the tray
and unroll the baguettes; back onto the tray. 
So you really roll the dough only half way...onto the paper....then back again....off the paper and onto the baking tray....be careful you leave enough room for heat to get around the baguettes......I did rise them all on the one tray...but for baking...spread them out over a few trays if the tray you use is full.
This way they bake nice and even all round.
Soy, Linseed, Almond, Sunflower seed & Pumpkin seed.
And rustic too....Ooops! Artisan...lol

4 seeded bread-sticks
and 6 rolls (short, fat bread-sticks)


Oh...the tray you rise them on needs to be a similar size to the one you bake on......No point rising a breadstick; only to find out it's too long to fit in your oven...That would make me mad. I just used the same trays.

Using a smaller loaf recipe of just plain white..I also made some rolls using the same technique...Only this time I used the width of the tray....

weighing each roll to ensure the same sized rolls.

see how I supported the canvas...my two trays were now in the oven baking 4 baguettes...
I sure hoped they came out before these finished rising.


keeping the warmth of the oven in...
I must build a fold-down shelf  above the stove...
to prove my breads on..(good idea nellymary)
 Taa Daaaaaaaaaaaaaaaaaahhhhhhhhhh!!


Apart from about half of my housework list, and helping mum try on clothes for most of the day....this is what I accomplished....after I got back home.


Oh....sorry for the long post...but if  you have been following along...You'll probably know by now that I ramble a whole lot.


What did you get up to today?   Will you try making baguettes with your favourite bread recipe?
I'd love to hear about it. What do you think for a first go?

On the go around here

What items are on the go in your house?

Taking inspiration from Rose's thread for her freezer inventory organisation over at the Down to Earth Forum......looking around my home, you could be excused to be thinking I have a few witches brews going here and there.....Although you won't see any Eye of Newt or any other freaky things around here...

I know I will forget some things...and it doesn't matter really...the point is...I always have something on the go.......and I would love to hear what everyone else is up to too.

Things without photos at the moment....are:
  • Soap is drying
  • There's newly planted things in the garden....
  • Cream sitting on the counter for 24 hours to begin a nice flavour to make clotted cream butter
  • a bag of frozen mashed sweet potato is defrosted on the sink to make scones.
  • Chillies threaded on cotton and hung to dry (from a friend)
  • Lemons off my tree....(I picked my first 9 lemons ever!!) Yay!! I had to pick them because Cocky's got two of them...The Nerve!..I hope I get a bigger yield next year, but for a first....Not bad....I think I will make Lemon Butter...that way we get to enjoy OUR lemons for many more months to come.
  • Stevia seeds drying....
  • Vanilla pod drying to use 2nd time around in Vanilla sugar.

Things that I do have a photo of to show you are:
  • I started a sourdough baby from the rest of my Kefir milk....and am now feeding it daily with wholemeal flour and water....

  • The lactic acid mix for the Bokashi powder I am making.
  • Seeds soaking to start a new batch of Sprouts...I also have Sprouts ready to eat in the fridge. 


L to R: Sourdough baby, Lactic Acid mix waiting to seperate, Seeds soaking to sprout

  • Vanilla extract...brewing away for xmas gifts
  • Citrus Cleaner...how could I forget that one? lol
  • Newly strained Pineapple/Apple Vinegar
  • Newly strained Honey Dew Melon Vinegar
  • Newly strained Apple Cider Vinegar

  • White wine Vinegar
  • Red Wine Vinegar
I love how thick the 'mother' is floating on top.

Using the White Wine Vinegar 'Mother' to kick start some new vinegars.


Red Wine Vinegar 'Mother'

see the ones in front, wrapped in plastic....
they're off to Caroline in QLD (finally)

  • Persimmons are beginning to ripen...All the way from Canberra.....Tammy, I haven't forgotten about the Persimmon Challenge...they have been happy in their box up until now...but lately a few are starting to change...so I have spread them out ...Mum tried one last night that was ripe...and she said it wasn't astringent at all...I do have a cake recipe for using astringent persimmons...and the rule is don't eat the cake until it is completely cold....then it doesn't take on that astringent effect on your tongue.......

In paper bags to promote new growth I have:
  • Sweet potatoes, ....both normal and purple skinned
  • Eshallots
  • Ginger....these will be planted out as soon as I prepare a space for them.
  • Garlic
  • Pink pontiac potatoes...these will be planted out as soon as I prepare a space for them.
I don't buy seed potatoes...I have always been happy with doing things this way...although the sweet potatoes is a new one for me..but any others work great.


  • Chokos....I have kept a few back to shoot...as I think a few people might be wanting a plant.....If you would like one....I'm willing to barter, (more so to cover the costs of postage.)
 There are a few more sprouting that are still on the vine too.


Phew!! So what's growing or on the go in your house?...is it in the garden, maybe the kitchen...or even the craft room....

I'd love to hear what you have on the go at the moment.....even better; blog about it, then come back and leave a link to your blog in a comment.

Related Posts Plugin for WordPress, Blogger...